Showing posts with label Recipes - Fun Finger Foods. Show all posts

5/1/11

Crowd Pleasin' Potato Skins


Crowd Pleasin' Potato Skins


12 russet potatoes (yields 24 skins)
canola oil
EVOO, extra virgin olive oil
sour cream
bacon, fried & crumbled
green onions, chopped thin
salt
monterrey jack cheese, shredded


So, who doesn't enjoy the appetizer menu & why not have it at home! Crowd Pleasin' Potato Skins may take a little time, but they are cheap to make & boy are they finger licking good!

Here we go!  Go ahead and bake your potatoes your favorite way.  I choose to clean them good, prick with a knife (to keep from exploding), slather with EVOO & salt (Kosher salt if you have it) and bake unfoiled for 50 min - 1 hour at 400 degrees. Turn half way while baking.

Let the baked potatoes cool, then slice in half.  Gently scoop out the potato, leaving at least 1/4 inch of flesh.  Now, if they begin to split or crack it is very easy to take the back of your spoon and press down the skin to the desired shape. Increase your oven temperature to 450 degrees, brush all sides with a good amount of Canola oil & sprinkle with Kosher salt (or regular salt).  Return to the oven & bake skin side down for 10 minutes, then flip and repeat the process with the skin right side up.

Now, for the yummy part!  Sprinkle with cheese & crumbled bacon, then return to the oven & broil for 3-5 minutes.  Be sure to watch closely & remove & soon as cheese is melted.  Top with a dollop of sour cream, green onion, salt & pepper.  That's it, time to dive in!  These are great for a party or perfect for family game night too.
Read more >>

Wendy's French Bread Pizza


Wendy's French Bread Pizza


Recipe for 2 crusts:

3 1/2 cups flour
1 1/2 cup water
2 1/4 tsp yeast
1 tsp garlic salt
1-2 tbls EVOO
Spray Oil

Sauce:

1 sm can tomato sauce
fresh basil, rough chopped
dried oregano
garlic salt (or fresh minced)
s & p

Topping ideas:
1. Extra Cheesy,  for kids of course
2. Extra manly, for the man in your life:  Italian Sausage, Canadian
    Bacon, Mushroom & Bk olives
3. Extra girly, for us!  Spinach, artichokes, grilled chicken & lots of 
    fresh basil

Baking Instructions:  Pre-bake crust at 425 for 5 minutes or until desired doneness - some like it softer and others more crunchy!  Cover with spices and toppings and bake for approximately 5 minutes or until cheese is lightly browned.
Read more >>

Curried Chicken Salad


Curried Chicken Salad


6 boneless skinless chicken breasts
1/2 cup plain yogurt
1/2 cup mayo
1 green apple, diced
1/2 cup dried cherries
1/3 cup pecans, chopped
1/2 to 1 tsp curry powder
few shakes Cavendars (or garlic salt & pepper will do too)
pinch of sugar


A twist on an all time classic!  This version of chicken salad adds a fun element of surprise... nobody can quite guess the flavor, but everybody wants the recipe! It's lots of fun & can be served on your favorite bread or simply with crackers.

First, boil your chicken breasts (or even pick up a classic rotisserie). Set aside to cool.  Meanwhile, in a bowl combine all the remaining ingredients. You can cube or shred the chicken, however you like the texture, and fold into the mixture.

Now, here we go.... it's all up to your liking!  Is it too dry for you, add more mayo or yogurt.  The yogurt is simply added to be figure friendly & can be substituted for full mayo as well.  You can also change your fruits and nuts around, but the above is my very favorite combo.  You can change the green apple for red or yellow.  You can substitute the dried cherries for fresh grapes or dried raisins & cranberries.  You can use whatever you have in your pantry.  I have even omitted the apples & done mandarin oranges before, which is nice  paired with the curry.

For a fun addition, I like to make spinach dip (picture above).  Here is my sneaky tip... Knorr Vegetable Mix.  The Green & Yellow box, with the recipe for Spinach Dip on the back. Usually, it has a picture of the dip on the front. Together, they make a great girls night!

Read more >>

Salsa Anyone?


Salsa Anyone?


4 ripe tomatoes
1 red pepper
1/3 red or yellow onion
2 mangos or 4 peaches
1-2 cloves garlic (All up to you!)
1/2 bunch cilantro, chopped
1/3 c red wine vinegar
1-2 limes 
1 jalapeno, SEEDED, oh seeded!
S&P


It's simple, yet something I could eat every day!  Sometimes, I have to make myself stop! It's healthy, fresh & my body just craves it... I think yours will too!

Simply chop all your veggies & fruit to a size you like.  I have one of those choppers, as seen on TV, and boy is it fast!  Ya know, one of those gadgets my Mom got me for Christmas... that I now can't live without!

Place all veggies in a bowl, add in cilantro, minced garlic, juice of 1-2 limes, red wine vinegar, extra fine chopped jalapeno (SEEDS REMOVED, S&P.  Done! Now, was that easy or what!

So, you can leave out the fruit if your not feeling fuity, you can omit the cilantro if it's not a family favorite, you can add in whatever veggie you do like.  The sky is the limit & it is always something people hoover around at our get-togethers.

Here is a little tip! Take your old tortilla shells and cut them like a pie with your pizza cutter or scissors.  Now, heat a skillet to Med/High.  Spray both sides of the cut tortilla shells with cooking spray & lighly brown on both sides.  You just made your own chips & they will be a hit!  If your not in the mood, I like eating this with the store bought chips that have a hint of lime... Mmmmm!
Read more >>

Need A Wippie Wings!


Need A Wippie Wings!


1 large bag wings
your favorite BBQ sauce 
(I suggest a local vendor or a mom & pop brand of BBQ.  We like Cookies, it's always a good option.)
S&P
cooking spray
aluminum foil


Here they are, Need A Wippie Wings!  So, the truth is, I'm not really a huge wing fan myself!  However, the guys around my table are big wing eaters &, if it makes them happy, then I'll fix them!  I found this technique, which is really all this recipe is about, & I have stuck with.  They never fail to turn out right!

So, preheat your oven to 500 degrees.  Then, line a cookie sheet with foil & spray with cooking spray, which is a huge mess saver.  Next, rinse your wings with water.  Now, it's all your choice what happens from here.  You can take your cooking sheers and cut off the tips and just have drumettes.  Option two, you can fold & lock them and have the large full wings my husband likes.  After you prepare your wings, place them on the pan then salt & pepper them to taste.  

Now, here is where the technique comes into play.  Cover the top side only of the wings with your favorite BBQ sauce, leaving the bottom side against the foil without sauce.  I like to use a pastry brush to slather them real good.  Half way through cooking, you are going to flip them with tongs and then apply the sauce to the opposite side.

Don't be concerned about how blackened your foil gets, it's bound to happen.  You are going to discard it anyway, so it really doesn't matter.  So, bake them for 15 minutes, then take them out flip & slather again.  Now, bake for 15 more minutes.  Time may vary depending on size of the wings.  Just take one out and slice to the bone.  Juices need to run clear for it to be cooked through.  It could take total of 30-45 minutes to cook through.  It will be shorter for drumettes & longer for full wings.

Time to plate them up!  Some like wings with blue cheese dressing, others with ranch & some just by themselves.  They are sure to please a hungry group & perfect for a game night get-together!
Read more >>

Smoked Gouda


Smoked Gouda


smoked gouda, round wheel
Pillsbury pastry dough (or your own recipe)


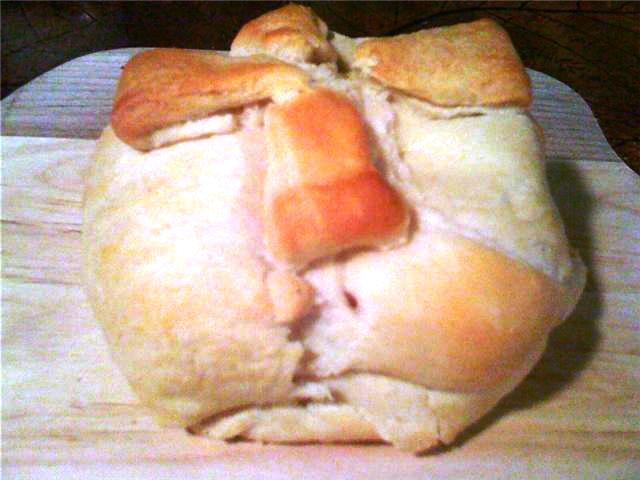
Cheese...yum!  If you are like me, cheese & bread are about two of my favorites!  It brings back memories of living in Spain for me, when we lived above a bakery & smelled fresh bread every day.  Well, this one is so simple & the perfect appetizer for most any meal.

Just take a round of smoked gouda, or other soft cheese of your choice.  Then, preheat oven according to pastry package.  Now, wrap the cheese with the pastry, trim off the edges & seal it tight.  I like to use the left over dough to make a bow on the top.  You could do your initial, leaves or just leave it plain.

Place in the oven & follow instruction on pastry box.  Make sure not to remove until the dough looks browned.  If your decorative bow seems to get too done, just remove it while the rest finishes baking & then replace it after removing from the oven.  Serve warm.

There are many variations of this easy technique.  Trish sent me one recently that looked wonderful.  She wrapped brie, with a layer of cranberry relish, in puff pastry.  It's all the same idea & looks extra pretty with a layer of mint jelly or chutney on top of the cheese too.  You can be creative & just follow your pastry direction.

Happy baking this holiday & enjoy all the warmth that comes with bringing something like Smoke Gouda Wrapped In Pastry to the table!
Read more >>

Black Jack Quesadilla


Black Jack Quesadilla


soft tortilla shells
black beans  (2 cans or follow my directions for homemade)
Monterrey jack cheese, shredded
pico or salsa (use your favorite or check out my recipe)
rotisserie chicken, shredded
fresh cilantro
cooking spray


It's Black Jack Quesadillas!  A blend of black beans, rotisserie chicken, Monterrey jack cheese, fresh salsa & cilantro.... mmmm.  So, these are a meal all by themselves, perfect along side chicken tortilla soup or an amazing appetizer too!  Who doesn't like a good quesadilla!

First, let's get all the ingredients ready.  After that, it's just like an assembly line as you pile it on your grilled tortilla!  Ok, lets talk beans!  For me, there is nothing like homemade black beans, they beat the canned ones hands down.  However, you can use canned and they will turn out just fine!  If you want to make your own....

Follow the directions on the back of the bag of beans.  You can soak all night or do the quick soak, which I usually opt for!  Add the proper amount of liquid for your beans, I like to mix half water and half chicken broth.  Then, while they are simmering, add a finally chopped medium onion, 3 cloves of minced garlic, 2 tsp cumin, 2 strips of bacon (whole & to be discarded), salt & pepper.  Also, a few shakes cayenne if you like it hot.  Now, let them do there thing according to your package.  In other words, you'll have to plan ahead several hours to have these ready to assemble with your quesadillas.  You will have plenty of beans this way, what you don't use for the quesadillas, can be served along side with rice!  Make sure and drain the portion for the quesadillas well, to keep them from getting the tortillas soggy.

Back to the other ingredients... shred your rotisserie chicken, prepare your salsa (recipe on this site) or open a jar, cut your fresh cilantro & get out the cheese!   Now, heat your skillet over med heat.  Spray cooking spray on one side on the tortilla and place the sprayed side down on the skillet. I like to add the cheese first, to ensure that it melts, followed by the chicken, black beans, salsa & cilantro.  


Then top with another sprayed tortilla shell.  Watch it close, flip carefully when ready.  I use a pizza cutter to cut it into the perfect size portions!

There you have it...Black Jack Quesadillas ready to serve! 
Read more >>

Beef Stew Empanadas


Beef Stew Empanadas


1 recipe for Beef Stew.Or, any stew will do!
1 box Pillsbury ready made pie dough
1 egg, whipped

That's it!

When fall rounds the corner, soup is in the air!  So, you don't have to wonder if I already made a pot of Heart Beef Stew, because you know I did!  Then, I was wondering what to do with the leftovers when the thought "empanadas" came to mind.  I first had these yummy little beef stuffed pastries in Argentina, but they originated in Spain & Portugal.  Talk about a delightful way to take lunch on the go!

It's so very simple to use any leftover thick stew that you have to come up with your own version of Stew Empanadas too.  Simply drain off the left over liquid, reserving only the hearty part of the stew.  In this case, the beef, potatoes & carrots.  Then, coarsely mash the mixture with a potato masher & shred the beef if needed. Set aside.

Now, unroll your pastry & cut out circles.  You can get 7 circles out of a Pillsbury Pie Dough.  Place a spoonful of the minced stew in the center of the pastry round. Although you will be tempted to load it too full, be careful because you have to be able to seal it too.  Now, gently fold over the dough and press the edges firmly with the tongs of your fork.  Place on an ungreased cookie sheet. Continue until all the rounds are done, 14 in all if using my method. (note: you will be surprised to know that it only takes about one bowl of soup to do all the empanadas!)

Finally, lightly brush with and egg wash (just one whipped egg) and place into a 350 degree oven for 8 minutes.  Meanwhile, it's time to make the little leaves to go on top.  I wait to put them on until the empanadas are half way cooked, that way the dough under the leaf is also done.  Just cut small, thin, triangles out of the remaining dough.  Using your knife,  score the vein of the leaf pattern right in the center of the triangle. Then, use your fork to make the indents along the sides... very simple... no worries!

After the 8 minutes are up, remove from the oven, place the leaf in the middle of the pastry  & brush just the leaf with the egg wash.  Now, cook until the empanadas are golden brown.  It will take anywhere from 8-14 minutes, depending on your filling.  Viola... there you have it!  A fun and easy way to make two meals out of one, even making one fun lunch for the road!  These are also perfect for a football party or fall festival too.
Read more >>

Trail Mix


Trail Mix


Here's Mine:
Dried Mangos
Dried Cherries
Chocolate Chips
Cheddar Chicks
Macadamia Nuts
Pretzels

Note: use any pretzel & any nut you like!  Try pistachios... yum!
Read more >>